Every day, you take care of your Keurig machine. You wipe up any spills, polish the exterior and make sure that your reservoir is nice and clean. Your Keurig machine is an investment—after all, you spent a pretty penny on it.
Every so often, no matter how well you give your machine some tender loving care, your machine will need a little extra love—especially if you’re in the habit of using tap water.
The problem isn’t your water, necessarily. It’s the calcified minerals your water leaves behind in the water lines of your machine. It’s clogging it up, making it taste “off.” This can be a bitter taste, a sour taste, or otherwise just not the coffee you’re used to.
When you have this “off taste”, it’s time to descale your machine. This “scale” is nothing more than the calcified mineral deposits left by your tap water.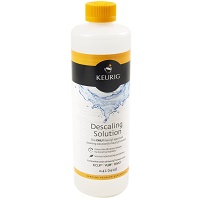
Keurig came out with a product called “[easyazon_link identifier=”B00FOT9W5Q” locale=”US” tag=”cafe049-20″]Keurig Descale Solution[/easyazon_link]” to battle this problem. This is the only solution approved by Keurig to use in your machine. It’s quite simple to use, although the exact instructions may be different depending on which Keurig model you own. Here’s how it works.
Items Needed to Descale
You will need the Keurig Descaling Solution, a large 10 oz. coffee mug, fresh tap water from the sink, and a timer—there will be a short waiting period of half an hour. The whole descaling operation will take a quarter of an hour, with a half-hour waiting period. You will need to turn the auto-off feature off, turn the brewer off, and take out the water filter.
Steps to Descaling Your Keurig
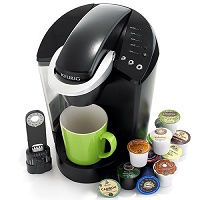 These simple Keurig Descale Solution instructions are catered specifically to the [easyazon_link identifier=”B00AQ9NIO0″ locale=”US” tag=”cafe049-20″]Keurig K45 Elite Brewing System[/easyazon_link], a Keurig 1.0 system. However, with some slight variation these steps would similarly work with all Keurig 2.0 models.
Step One
– This is your first descaling rinse. Begin with a clean, empty coffee machine. Remove the water reservoir and hand-wash it in the sink. Dry the exterior, and return it to the brewer.
Step Two
– Open the [easyazon_link identifier=”B00FOT9W5Q” locale=”US” tag=”cafe049-20″]descaling bottle[/easyazon_link] and pour the entire solution into the water reservoir.
Step Three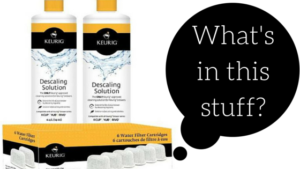
– Take the bottle to the sink and refill with fresh water. Pour this water into the tank, adding it to the original solution. We’re going for a 50/50 solution here—50% descaling solution to 50% water.
Step Four
– Set your coffee mug on the drip tray.
Step Five
– Turn the machine on. Lift the handle and remove any previous K-Cup. The brewer needs to be empty for this process. Lower the handle, shutting the lid close.
Press and hold the middle 10oz. brew button—the brewer will dispense about 6 ounces of hot water. Pour this solution down the drain.
Step Six
– Repeat the process of filling the cup up and pouring its contents down the drain until the descaling solution has been used up entirely, and the water tank is empty.
Step Seven
– With the power on, set the timer for 30 minutes and leave the brewer alone. There is still descaling solution in the internal water lines of your machine. Waiting gives the solution a chance to return to the water tank, plus it gives the solution a chance to work its magic on the internal water lines of the machine, getting rid of any scale build-up.

Step Eight
– After half an hour, take the water reservoir to the sink and pour its contents down the drain. Take just a minute and rewash the tank, making sure to get rid of any excess descaling solution that may be in the reservoir.
Step Nine
– Dry the exterior once again, then fill the reservoir with water to the max fill line. Return your mug to the machine, and continue to do what you did before—hold the middle 10oz. brew button to fill the cup with hot water. With each cup, pour the water down the drain.
Step Ten
– You need to fill a minimum of 12 cups up with fresh water to completely rinse out your machine. You’ll notice that the water reservoir will be empty before the process is over. Refill the water tank to the max fill line as needed to complete the process.
That’s it! Congratulations! You just descaled your brewer, and now it’s ready to make a brand new cup of coffee, tasting the way it did when the brewer was brand new!
To keep your coffee machine in tip-top shape, plan on descaling your machine every 3 – 6 months.
Conclusion
Reading through these steps may make it seem like a daunting task you have ahead of you. I assure that it’s not. In fact, it’s a normal part of owning a Keurig. The fact that Keurig made a descaling solution stands as a testament that even Keurig knew people would need a way to descale their machines. The descaling solution is Keurig’s answer.
Your Keurig machine is a sophisticated blend of mechanical machinery and technical prowess. It is not your basic coffee machine. If you wanted a basic coffee machine, you wouldn’t have purchased a Keurig to begin with. It has parts and designs that would take an engineer more than a few moments to decipher. After all, they did more than re-engineer how you make coffee. They kickstarted an entire industry of single-serve coffee machines. Take care of your machine, and it will take care of you for years to come.
[easyazon_cta align=”center” identifier=”B00FOT9W5Q” key=”wide-orange” locale=”US” tag=”cafe049-20″]