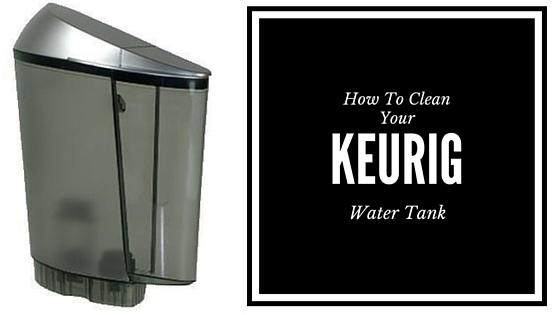
 [easyazon_image align=”right” height=”260″ identifier=”B00KYWL34Q” locale=”US” src=”http://coffeemakersparadise.com/wp-content/uploads/2016/06/41UYE9wxJCL.jpg” tag=”cafe049-20″ width=”260″]Keurig coffee makers are a great way to get your morning (or afternoon or evening) cup of coffee, but with repeated use, particularly in areas with hard water, mineral deposits or “scale” can build up inside the sealed portions of the coffee maker. New users often want to know how to clean a Keurig water tank, particularly that of the [easyazon_link identifier=”B00KYWL34Q” locale=”US” tag=”cafe049-20″]Keurig 2.0[/easyazon_link]. It is an easy process and will prevent mineral scale from building up and clogging the inside your coffee maker.
How to Clean a Keurig Water Tank: Step 1
[easyazon_image align=”right” height=”250″ identifier=”B000RO08L0″ locale=”US” src=”http://coffeemakersparadise.com/wp-content/uploads/2016/06/41ZnMBLfPjL.jpg” tag=”cafe049-20″ width=”100″]Gather the things you will need including undiluted white vinegar, ([easyazon_link identifier=”B000RO08L0″ locale=”US” tag=”cafe049-20″]Heinz White Vinegar[/easyazon_link] works well and is not overpriced) a ceramic mug the size you usually use for coffee, a paperclip or other thin metal device about that size, a drinking straw and a clean dishcloth, such as the [easyazon_link identifier=”B003ZJL51G” locale=”US” tag=”cafe049-20″]Full Circle Tidy Organic Dishcloth[/easyazon_link].How to Clean a Keurig Water Tank: Step 2
[easyazon_image align=”left” height=”250″ identifier=”B003ZJL51G” locale=”US” src=”http://coffeemakersparadise.com/wp-content/uploads/2016/06/41JTXfoPsGL.jpg” tag=”cafe049-20″ width=”140″]You will first do a quick vinegar rinse. Instead of filling the Keurig with cold water, fill it with white vinegar. You want to use white vinegar because it is the least expensive of the vinegars (you are using it because of the acid, not because of the flavor). Place the mug on the drip tray to catch the vinegar. Lift the brewer handle but do not add a K-cup (vinegar and coffee do not mix!). After five seconds, put the brewer handle in the brew position and press the “brew” button. Allow the vinegar to “brew” and fall into the mug. Dispose of the hot vinegar in the sink (or put it in your mop bucket, add water and clean the kitchen floor while you are waiting on the Keurig).
How to Clean a Keurig Water Tank: Step 3
[easyazon_image align=”right” height=”230″ identifier=”B00WSWGVZQ” locale=”US” src=”http://coffeemakersparadise.com/wp-content/uploads/2016/06/41XHrutzYQL.jpg” tag=”cafe049-20″ width=”230″]The next step is the vinegar soak. Refill the Keurig with more cold vinegar, and place the empty mug back on the drip tray. Again, lift the brewer handle but do not add a K-cup, and after five seconds, put the brewer handle in the brew position. Watch the red light. When it switches from a flashing red to a solid red, power the machine off and let it soak for thirty minutes or more. Now is a good time to use that vinegar and water to mop the kitchen floor. I use the [easyazon_link identifier=”B00WSWGVZQ” locale=”US” tag=”cafe049-20″]O-Cedar Easy Ring Mop and Bucket System[/easyazon_link].How to Clean a Keurig Water Tank: Step 4
While your vinegar is brewing, take this time to wipe down your machine with a damp rag, or you can put this step off until later.
How to Clean a Keurig Water Tank: Step 5
After thirty minutes, turn the brewer’s power back on, lift and lower the handle and then press the “brew” button. Once the vinegar has brewed, dispose of it (or use it to mop the bathroom floor).
How to Clean a Keurig Water Tank: Step 6
Refill the brewer with cold fresh water, place the mug back in the drip tray and and “brew” the water without a K-cup. Dispose of the hot water (or let it cool and use it to water acid-loving plants). Repeat three more times, so that all minerals make their way out of the machine and so that your next cup of coffee does not taste like vinegar.
Once you have cleaned the water tank, you will want to take some time to clean the rest of the machine. Remove the removable parts and wash them in warm soapy water (you probably do this regularly anyway, right?). Wipe down the outside as well. Take a drinking straw and put it over the entrance to the water line and blow to dislodge any debris in the line.
Besides cleaning the tank and the easily washed parts of the Keurig, users should also clean the exit needles, the parts that pierce the K-Cups and let all that delicious flavor into the coffee.
How to Clean the Exit Needles: Step 1
Locate the exit needles in both the inside bottom and upper portions of the K-Cup Holder.
How to Clean the Exit Needles: Step 2
Straighten the paper clip and insert it (or something similar) into each hole, moving it around to make sure you have loosened all debris. You can watch Keurig’s video on how to clean the entry and exit needles and follow their instructions.
If properly maintained, your Keurig should give you years of service and many delicious cups of coffee.


